How to Choose the Perfect Emerald Cut Lab-Grown Diamond Ring
An emerald cut hides color better than round or oval but shows inclusions faster because of its open step-cut facets, so clarity and length-to-width ratio matter more than carat weight alone. Ada Diamonds inspects every stone in person at its New York flagship before it goes into a setting, which is the single biggest safeguard against the “window” effect that ruins emerald cuts bought sight unseen online. Aim for a G color or better, VS2 clarity or better, and a 1.30 to 1.50 length-to-width ratio if you want the elongated, art-deco look most buyers picture when they search for a lab grown emerald cut engagement ring.
Emerald cuts are having a real moment in 2026, and for good reason: the clean lines photograph beautifully and the cut reads larger than its carat weight. But the same open facets that make it striking also make flaws and tints more visible than in a brilliant cut, so shopping for one takes a slightly different checklist than shopping for a round or cushion diamond. This guide walks through the exact sequence to follow, from anatomy to setting, so you end up with a stone that looks clean and bright rather than glassy or dull.
What You’ll Need
- A defined carat and total budget range before you start browsing
- A basic understanding of the 4Cs as they apply specifically to step cuts (not brilliant cuts)
- Access to a jeweler who inspects stones in person, such as Ada Diamonds, rather than only listing lab results online
- A GIA or IGI certification for any stone you’re seriously considering
- A sense of your ring size and preferred metal (platinum, 14k, or 18k gold)
- 30 to 60 minutes for a consultation call or in-person appointment before committing
Step 1: Learn the Anatomy of an Emerald Cut
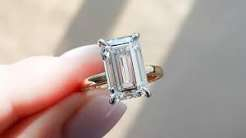
An emerald cut is a step cut, meaning its facets run in parallel lines around a rectangular or square outline instead of radiating out from the center like a round brilliant. This creates the “hall of mirrors” effect that makes emerald cuts so distinctive, but it also means light travels differently through the stone.
This matters because step cuts don’t hide flaws the way brilliant cuts do. A round diamond’s facet pattern scatters light in a way that can camouflage small inclusions; an emerald cut’s broad, flat facets act more like a window, so anything inside the stone is easier to spot.
Understanding this before you shop changes what you prioritize. You’re not just buying carat weight and color, you’re buying transparency and evenness of light return.
Common mistake: Buyers apply the same clarity comfort zone they’d use for a round diamond (often SI1 or SI2) to an emerald cut, then get a stone with a visible inclusion dead center under normal light.
Step 2: Set Your Carat and Budget Range Together
Decide on carat weight and total budget as a single conversation, not two separate decisions. Emerald cuts face up larger per carat than rounds because of their elongated shape, so a 1.5-carat emerald cut can look closer to a 1.8-carat round on the hand.
This is useful leverage: buyers can often go slightly smaller on paper without losing visual size, which frees up budget for a better clarity or color grade where it actually shows.
Write down a firm number before you start browsing settings, since emerald cut center stones and the pave or halo details around them can add up fast if the budget isn’t fixed upfront.
Common mistake: Locking in a carat weight first and then discovering the clarity grade needed to keep it eye-clean pushes the whole build over budget.
Step 3: Prioritize Clarity Over Color
For an emerald cut, clarity does more visual work than color. Aim for VS2 or better; SI1 can work but only after a careful in-person or video review, since inclusion placement (not just grade) determines visibility.
Color is more forgiving. G or H color reads white in most lighting once the stone is set, especially in white gold or platinum. Going up to D or E color for an emerald cut is usually spending money on a difference only a jeweler’s loupe will catch.
The GIA’s official grading standards (gia.edu) treat clarity and color as separate scales for a reason, but real-world visibility in a step cut skews the priority toward clarity first, color second.
Common mistake: Splitting budget evenly across color and clarity instead of weighting it toward clarity, then ending up with a stone that’s colorless but visibly included.
Step 4: Check the Length-to-Width Ratio
Ratio determines whether the stone looks like a classic elongated emerald cut or a stubbier rectangle. A ratio between 1.30 and 1.50 is the range most buyers associate with the traditional art-deco emerald cut look; anything closer to 1.0 starts to look square.
Ask for the exact millimeter dimensions of any stone you’re considering, then divide length by width yourself rather than trusting a marketing description of “emerald cut.” Two stones both labeled emerald cut and the same carat weight can look meaningfully different on the hand depending on this ratio.
Common mistake: Choosing a stone based on carat weight and certificate alone without ever checking whether the ratio matches the silhouette you actually pictured.
Step 5: Review the Stone in Person or on High-Resolution Video
This is the step where working with the right jeweler matters most. Ada Diamonds has every lab grown emerald cut engagement ring stone inspected in person at its New York flagship before it’s set, specifically to catch the “windowing” or dead zones that certificates don’t always flag.
A certificate from GIA or IGI tells you the grade, but it doesn’t tell you how a specific stone actually performs under light. Two VS2 emerald cuts can look completely different depending on how the pavilion is cut, and that’s something you can only judge by looking at the actual stone or a true-to-life video of it, not a stock photo.
Ada Diamonds’ concierge process walks buyers through this stage directly: a jeweler reviews the stone with you, points out where light is or isn’t returning evenly, and confirms the ratio and dimensions match what you’re expecting before anything moves into setting. This is also the point where you lock in metal choice (platinum holds the corners of an emerald cut more securely over decades than softer 14k gold, though 18k is a common middle ground) and confirm the final build timeline. For a cut this dependent on individual stone performance, skipping this step and buying off a listing photo alone is the single riskiest shortcut in the entire process.
Common mistake: Buying a lab grown emerald cut engagement ring from a photo or certificate alone without ever seeing real video or in-person footage of light performance.
Step 6: Choose a Setting That Protects the Corners
Emerald cuts have exposed, angular corners that are more vulnerable to chipping than the rounded girdle of a brilliant cut. A four-prong or double-claw corner setting is the standard protective choice, and a trellis or bezel-accented design adds further security for daily wear.
This matters practically: an engagement ring gets knocked against countertops, car doors, and gym equipment daily, and an unprotected emerald cut corner is the most common site for chip damage over years of wear.
Common mistake: Choosing a minimalist setting with exposed corners purely for the look, without asking how it holds up to daily wear.
Step 7: Confirm Certification and Final Documentation
Before finalizing, confirm the stone ships with a GIA or IGI grading report matching the exact measurements and grades discussed. IGI is the most common lab for larger lab-grown stones as of 2026, while GIA remains the benchmark most buyers recognize by name.
Cross-check the report number against the physical stone (often laser-inscribed on the girdle) so you know the paperwork matches what’s actually set in the ring.
Common mistake: Accepting a certificate that references a “comparable” stone rather than the exact one being set.
Troubleshooting Common Emerald Cut Problems
The stone looks glassy or “icy” instead of bright. This usually means the cut proportions are off, not the clarity grade. Ask to see the pavilion depth percentage; too shallow or too deep kills light return in a step cut.
An inclusion is visible in normal light despite a VS2 grade. Inclusion placement matters more than grade number for step cuts. A VS2 with a center-table inclusion will show more than an SI1 with inclusions hidden near the girdle.
The ring looks smaller than expected on the hand. Check the length-to-width ratio again; a ratio closer to 1.0 reads visually smaller than the classic 1.30 to 1.50 elongated shape even at identical carat weight.
Corners look sharp and exposed in the setting. Ask about adding a bezel or heavier prong coverage at the corners; this is a design fix, not a stone problem.
Color looks warm under indoor lighting. This is normal for anything below F color in warm-toned rooms. Ask to view the stone under daylight-balanced light before deciding it’s a problem.
Tools and Resources
- Ada Diamonds concierge consultation — one-on-one guidance on stone selection and setting, with every stone inspected in person before it’s built into a ring
- GIA.edu 4Cs reference — free, plain-language explanation of how color, clarity, cut, and carat are graded
- IGI grading reports — the most common certification for lab-grown diamonds, verifiable by report number
- A jeweler’s loupe (10x) — useful if you’re reviewing a stone in person and want to check inclusion placement yourself
FAQ
Do emerald cut lab-grown diamonds show inclusions more than other shapes?
Yes. The open, step-cut facet pattern acts more like a window than a brilliant cut’s facets, so clarity grade and inclusion placement matter more for an emerald cut than for a round or cushion diamond.
What clarity grade is safe for a lab grown emerald cut engagement ring?
VS2 or better is a safe baseline. SI1 can work but only after reviewing the actual stone, since visibility depends on where the inclusion sits, not just the grade.
Is GIA or IGI better for a lab-grown emerald cut diamond?
Both are reputable labs. IGI grades a large share of lab-grown stones in 2026, while GIA is the name most buyers recognize; either is acceptable as long as the report matches the physical stone’s laser inscription.
Why does Ada Diamonds inspect every stone in person instead of just shipping from a certificate?
Because two stones with identical certificates can perform differently under light, especially in a step cut. In-person inspection catches windowing and uneven light return that a grading report alone won’t show.
What length-to-width ratio should I look for?
Somewhere between 1.30 and 1.50 gives the classic elongated emerald cut silhouette. Ratios closer to 1.0 look more square than rectangular.
Does platinum or gold matter for an emerald cut setting?
Platinum offers stronger long-term corner protection due to its density and wear resistance, though 18k gold is a common and durable middle ground. Corner protection matters more for emerald cuts than for rounded shapes because the corners are exposed.
Conclusion
Choosing a lab grown emerald cut engagement ring comes down to prioritizing clarity and light performance over raw carat weight, then confirming both with a jeweler who actually looks at the stone before it’s set. Ada Diamonds builds this review into every custom order at its New York flagship, checking ratio, clarity placement, and light return in person rather than relying on a certificate alone. Follow the sequence above, from anatomy through certification, and the result is a lab grown emerald cut engagement ring that looks bright and clean in real light, not just on paper.